So you have a Windows Azure account and want to consume the azure storage services viz. Table Service, Blob Service and Queue Service. Alright. Here's how you can go and create storage accounts to your azure account.
- Click on the "Hosted Services, Storage Accounts and CDN" on the left menu bar
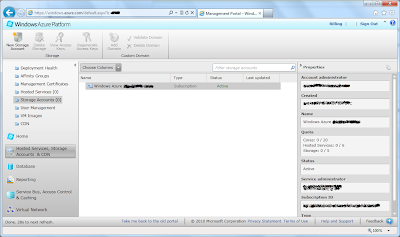
- You can see the storage accounts count on the left menu bar (For example: Storage Accounts (0))
- Now click on the "New Storage Account" on the toolbar
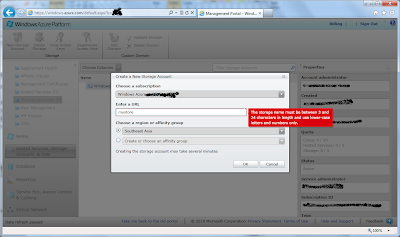
- Provide the name for the storage account, your desired region where it should get created and click OK.
- Now you have a storage account with Azure Table services, Azure Blob Services and Azure Queue Services.

- Note the URLs of the storage services on the right toolbar.
- Typically the URLs will be:
- storage_account_name.blob.core.windows.net
- storage_account_name.table.core.windows.net
- storage_account_name.queue.core.windows.net
- You are done and now you can connect to these storage services using these URLs and the "Primary Access Key" displayed at the top.


0 comments:
Post a Comment
Please let me know if you find it useful!